If you’ve ever tried to build a bot in the past, you may have noticed that they often rely upon a long-lived websocket. This means that your code needs to stay running all of the time, as a daemon.
A serverless approach means writing efficient, stateless functions that respond to events and can be scaled independently. They only need to run when an event is available and can be scaled down to zero when not in use. Fortunately, most platforms that support websockets, also support webhooks for responding to events.
Why did I want to build a bot for Discord?
We recently migrated our company communications from Slack to Discord - it’s a great tool for small teams and communities. One of the things we missed was being able to create a Zoom meeting on-demand within a DM or channel. Discord has its own screen-sharing and video calling features, so perhaps it’s a non-goal for them to make Zoom easy to use. We have used the voice chat feature on Discord, but HD screensharing requires an additional subscription which doesn’t make sense when we pay for Zoom already.
With Slack, building a webhook-driven Slash command is trivial, however with Discord, I found the process to be long - drawn out and perplexing. So I’m writing this tutorial to help you create your own Discord bots with OpenFaaS. I’ll be using Go - but you can translate the steps to other languages relatively easily once you understand how it all works.

Conceptual architecture for the Discord to Zoom bot
See examples for Slack Slash commands:
- ChatOps bot for OpenFaaS Cloud - Go example for DevOps using chat for a PaaS platform
- Slash command template for Python developers by Lucas Roesler
There are two common types of integration for messaging products like Slack and Discord:
- Your code sends a message to a channel or user via a HTTPS endpoint hosted by the messaging platform
- A user types a command into a channel or DM and the messaging platform sends an event to your code
We’re covering the second type of integration in this walkthrough, but I also have an example at the end for how to send a message to a channel via a webhook.
I’ll be walking you through some of the code, but the rest is available on GitHub. At the end of the post we’ll deploy the bot to OpenFaaS - with either Kubernetes or faasd. faasd can run on a VM with very low resource requirements, so it’s a great way to get started with something like a bot and a few cron jobs.
If you’re following along - then we’ll be saving a number of secrets into a local .secrets folder and then use faas-cli secret create to make them available to the function.
Working backwards from the goal
We know that we’d like a command that can be typed into start a Zoom meeting - but is it even possible to create a Zoom call via an API?
That’s where I started - and it turned out that there isn’t just one version of the Zoom API, but two. And not just one way to authenticate a background process like a function, but multiple. After several hours of following outdated documentation, I found out that what you need is the V2 API and a JWT token obtained over an OAuth2 flow.
You can find the Zoom developer docs here.
You’ll need to click Create an App

The app I created for this tutorial
We also need to save the client_id and account_id into the zoom_config.yaml file, make a copy of example.zoom_config.yaml.
Save your Account ID as .secrets/zoom-account-id, Client ID as .secrets/zoom-client-id and Client Secret (.secrets/zoom-client-secret). All of these are required to make an API call to Zoom to obtain a short-lived JWT token. The JWT token will be used against the API endpoints to manage meetings.

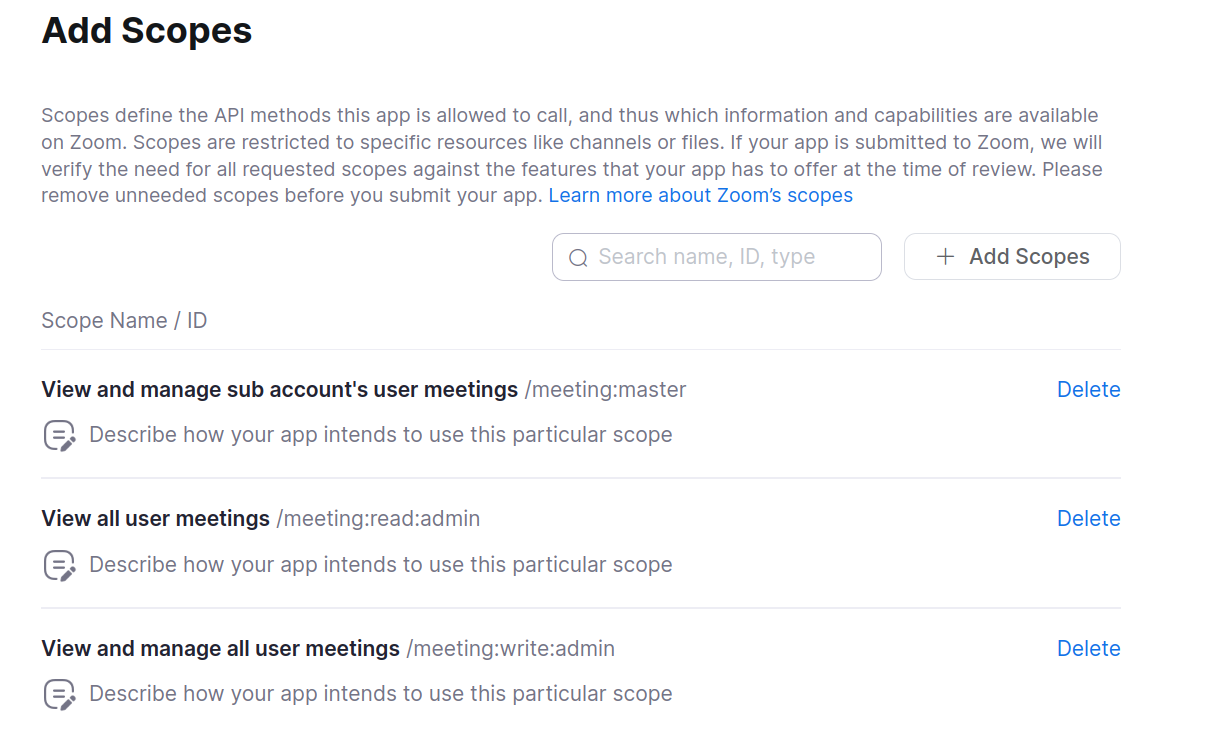
The requested scopes for creating a meeting
Depending on what you want your command to do, you may pick and choose your own set of scopes.
Since the bot is only for internal use by our team, I picked: Intend to publish: No and Account-level: app. If you want to publish your bot for others to use, then you will need to go through some additional verification and steps.
If you look at the zoom.go file that I created, you’ll see that the requestZoomToken function is called to obtain the JWT access token.
A HTTP POST is made to https://zoom.us/oauth/token with grant_type of account_credentials, and then the client ID and client secret are encoded as username/password within an Authorization: Basic HTTP header.
Learn more about Zoom authentication
The response contains the token:
// ZoomTokenResponse is the response from Zoom's OAuth endpoint
// when requesting a token for server to server authentication.
type ZoomTokenResponse struct {
	AccessToken string `json:"access_token"`
	TokenType   string `json:"token_type"`
	ExpiresIn   int64  `json:"expires_in"`
	Scope       string `json:"scope"`
}
Later on, when being invoked by the Discord bot, the meeting will be created by the createMeeting function.
A HTTP POST is made to https://api.zoom.us/v2/users/${userId}/meetings with the JWT token in an Authorization: Bearer header.
The meeting has an optional topic, but the start time is immediate and the password is auto-generated, then returned to the user in the Discord channel.
There are other inputs and outputs you can play with, but this is the minimum viable input.
See also: Zoom: Create a meeting for the user
Building the Discord bot
For the Discord integration, we need to:
- Create an app on the Discord developer portal
- Create a bot user and obtain its token
- Configure an incoming webhook URL to the function
- Register the slash command from the function
- Verify test webhooks
- Finally parse the command and call the Zoom API
That’s rather a lot. And one main difference between Slack and Discord is just how complex all of the above is. The slash command is also registered from your function, not created in the Discord developer portal.
Create the app and bot user
Go to the Discord developer portal and click “New Application”.
Note down the Client ID - this is not a secret, and will be set as an environment variable on the function in discord_config.yaml by making a copy of example.discord_config.yaml.
Click the “Bot” tab, then “Reset token” - save the result as .secrets/discord-bot-token, it’s your Bot’s API token.

Getting the bot token
Every message we receive from Discord will come with a signed header that we need to verify. Once we’ve verified the message, we can use the username against an a custom Access Control List (ACL) of usernames that are allowed to use the bot. I just set the list to my own username obtained by looking at the Discord UI.
Set that value in discord_config.yaml under the discord_usernames field. Or, if you have multiple people who’ll use the bot, add a comma between each username you add.
Next, you’ll need a way of receiving incoming webhooks to your function.
If your OpenFaaS cluster or faasd server is exposed to the Internet, you’ll just use the public domain you set up and add a path of /function/discord-start-zoom or similar. In my case, I’m running on my home network, so I created an HTTPS tunnel using inlets.

Set the interactions URL to your function’s public URL
Note that you may want to set this URL once the function is fully deployed and configured since editing the URL will cause a challenge to be sent to the URL.
When your function starts up, it should register any commands it needs. I do this with a text field as the input, however Discord supports rich inputs and outputs if you need that.
	discordClientID := os.Getenv("discord_client_id")
	if len(discordClientID) == 0 {
		panic("discord_client_id not set")
	}

	registerCommand := fmt.Sprintf("https://discord.com/api/v10/applications/%s/commands",
		discordClientID)

	botToken, err := sdk.ReadSecret("discord-bot-token")
	if err != nil {
		panic(err)
	}

	commandOptions := `{
        "name": "zoom",
        "description": "Create a Zoom meeting",
        "options": [
            {"name": "topic",
            "description": "The topic of the meeting",
            "type": 3,
            "required": false}
            ]}`

	req, err := http.NewRequest(http.MethodPost, registerCommand, strings.NewReader(commandOptions))
	if err != nil {
		panic(err)
	}

	req.Header.Set("Content-Type", "application/json")
	req.Header.Set("User-Agent", "DiscordBot (https://alexellis.io, 1)")
	req.Header.Set("Authorization", "Bot "+botToken)
Unfortunately, the types of messages and inputs are all represented by integers which means you need to try to memorise these or map them in your mind whilst you’re developing. See also: Message components
I placed the above code into the init() of the Go function, so it’s performed whenever the function is deployed or scaled up from zero.
Once you set your function’s URL in the Discord developer portal, Discord’s server will send an API challenge with the message type of type: 1 which is a challenge requiring a response.
You can read exactly how this works over in the receiving-and-responding docs or skip to verify.go in my bot.
If you’ve validated webhooks from GitHub in the past, then it’ll feel similar, however this is a bit more complex and uses the Ed25519 algorithm instead.
Your bot will have its own Public Key that is used to sign the message, you’ll need to save it from the dashboard and then create a separate secret for it. Save the text into .secrets/discord-bot-public-key.
Add the bot to your server
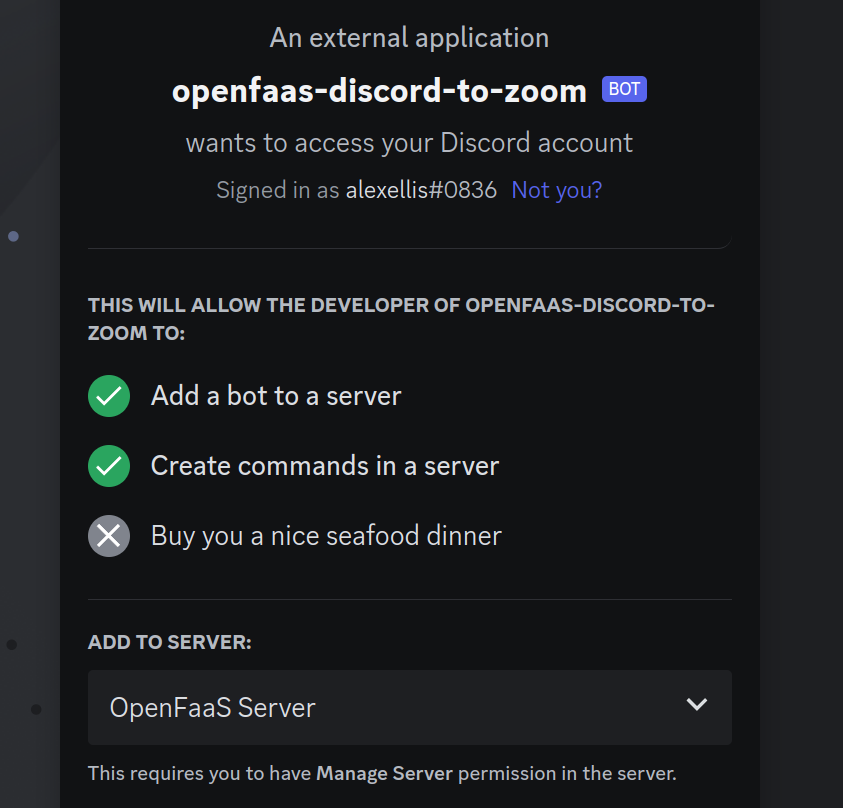
Since the bot is classed as an internal integration, and not a public one, you’ll need to add it to your server manually using an OAuth2 authorisation flow.
export discord_client_id="1067047141857570857"
echo "https://discord.com/api/oauth2/authorize?client_id=${discord_client_id}&scope=bot&permissions=0"

OAuth2 consent screen for your bot app
You should see the appear in your server, and can review it by going to Server Settings then Apps:

The bot installed on your server
Testing it out
If you’ve completed all of the setup in the developer portals for Zoom and Discord, then the next step is to:
-
Create all the required secrets using the files saved in
.secrets/faas-cli secret create discord-bot-token --from-file .secrets/discord-bot-token faas-cli secret create discord-public-key --from-file .secrets/discord-public-key faas-cli secret create zoom-account-id --from-file .secrets/zoom-account-id faas-cli secret create zoom-client-id --from-file .secrets/zoom-client-id faas-cli secret create zoom-client-secret --from-file .secrets/zoom-client-secret - Double check the values in
discord_config.yamlandzoom_config.yaml - Deploy the function to your cluster
faas-cli deploy - Verify that the challenge was passed by checking the logs
faas-cli logs discord-start-zoom 2023-05-12T10:35:06Z 2023/05/12 10:35:06 Ping verified? true 2023-05-12T10:35:06Z 2023/05/12 10:35:06 POST / - 200 OK - ContentLength: 11B (0.0030s) 2023-05-12T10:35:07Z 2023/05/12 10:35:07 Ping verified? false 2023-05-12T10:35:07Z 2023/05/12 10:35:07 POST / - 401 Unauthorized - ContentLength: 26B (0.0013s) - Install the bot on your server with the OAuth2 URL
- Send a message to your bot in Discord

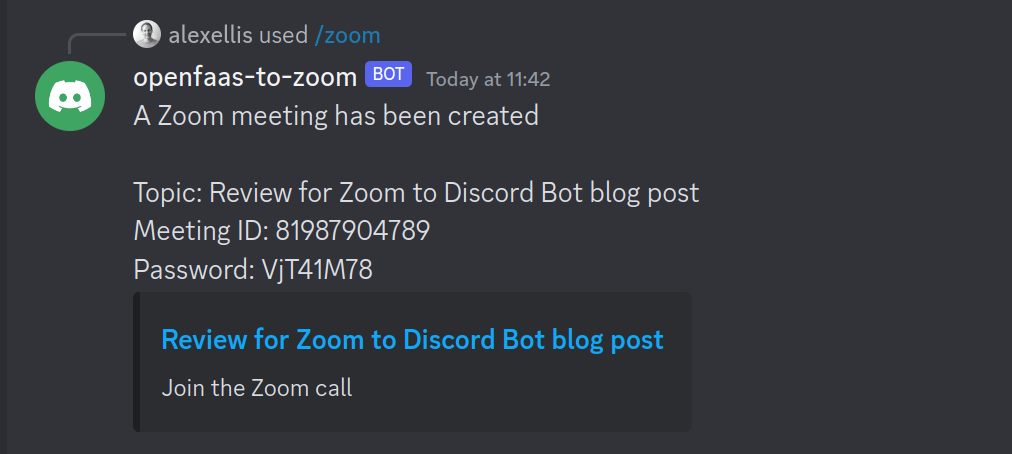
Creating a Zoom meeting to review this blog post
We can see the logs that the call was created:
faas-cli logs discord-start-zoom
2023-05-12T10:41:33Z 2023/05/12 10:41:33 Created a Zoom call for: Business chat
2023-05-12T10:41:33Z 2023/05/12 10:41:33 POST / - 200 OK - ContentLength: 303B (1.0553s)

If you’d like to see the full body of the request sent via Discord, then you can edit stack.yaml and set the print_input environment variable to true and redeploy the function.
If you’d like to customise my bot, then just do the following:
- Fork the the repository - on GitHub
- Clone your forked version to your own machine
- Edit the files you want to change
- Swap my username / Docker Hub account in
stack.yamlunder theimage:field to your own - Run
faas-cli upand try out the new changes.
Conclusion
I’ve tried to fast-track you to being able to create a webhook-driven Discord bot using Golang and OpenFaaS.
Webhook-driven functions can be deployed to FaaS platforms, get scaled down to zero when idle, and don’t need to be running 24/7 just in case there’s a request from a user. This makes them cheaper to run - stateless and much more efficient than a daemon that runs all the time.
Most of the work here isn’t in writing the bot, but in understanding how the authorization and integration model works - both with Discord and any other platforms you want to integrate with.
There’s another way to integrate with Discord which is much easier, which is to send one-way messages when something happens in an external system.
I built a bot to send messages to a Discord channel whenever someone checks out on Gumroad. You can read the code here: Get webhooks in Slack every time you sell a product on Gumroad. It’s written in JavaScript and uses Node.js as the runtime. There’s also an integration with AWS SES to send emails to customers for certain conditions.
With OpenFaaS you can write your own integrations in whatever language you like and deploy them to either to Kubernetes with OpenFaaS, or to a single machine using the faasd project. They’ll run almost identically, and you probably don’t need to have the function scale at all for personal use or for a small team.
When I first shared a demo of this bot on the weekly OpenFaaS Community Call, Kevin Lindsay suggested making some generic function that could register many different functions and then as it received different calls, would fan them out to separate functions. This would mean the complicated parts of working with Discord could be hidden away.
What would you build with a webhook-driven Discord bot? Let me know on Twitter @alexellisuk.
Further reading
To learn how to build functions in Go - check out the Premium or Team edition of my e-Book Everyday Golang
And for Node.js functions - and a complete manual for the faasd project - check out Serverless For Everyone Else.
Anyone sponsoring OpenFaaS via GitHub receives a 20% discount on all eBooks.

